Inflatable lifejackets: inspection, leaks and rearming
A model-specific method for checking the cylinder, inflator and bladder, running a meaningful leak test, and rearming an inflatable lifejacket without incompatible parts.
In brief
To inspect an inflatable lifejacket, first identify its exact model and rearming kit, then examine the fabric, webbing, status indicator, CO₂ cylinder, inflator and oral tube. Run the leak test for the duration and pressure specified by the maker. After gas inflation, replace every required component, confirm the indicator and repack precisely as the manual shows.
Article outline
An inflatable lifejacket can look immaculate while one hidden link in its operating chain is already compromised. Inflation depends on the correct CO₂ cylinder, a functioning inflator, an airtight bladder, an oral valve and a fold that lets the bladder deploy. A meaningful inspection therefore follows the exact model instructions rather than the appearance of the outer cover.
The practical approach is to separate the pre-wear check, the periodic leak test and rearming after deployment. This guide is Batoo’s editorial synthesis of Transport Canada and RNLI guidance; it does not replace the maker’s manual, professional servicing, or rules that apply to a particular vessel and operation.
Start with the label, not the outer cover
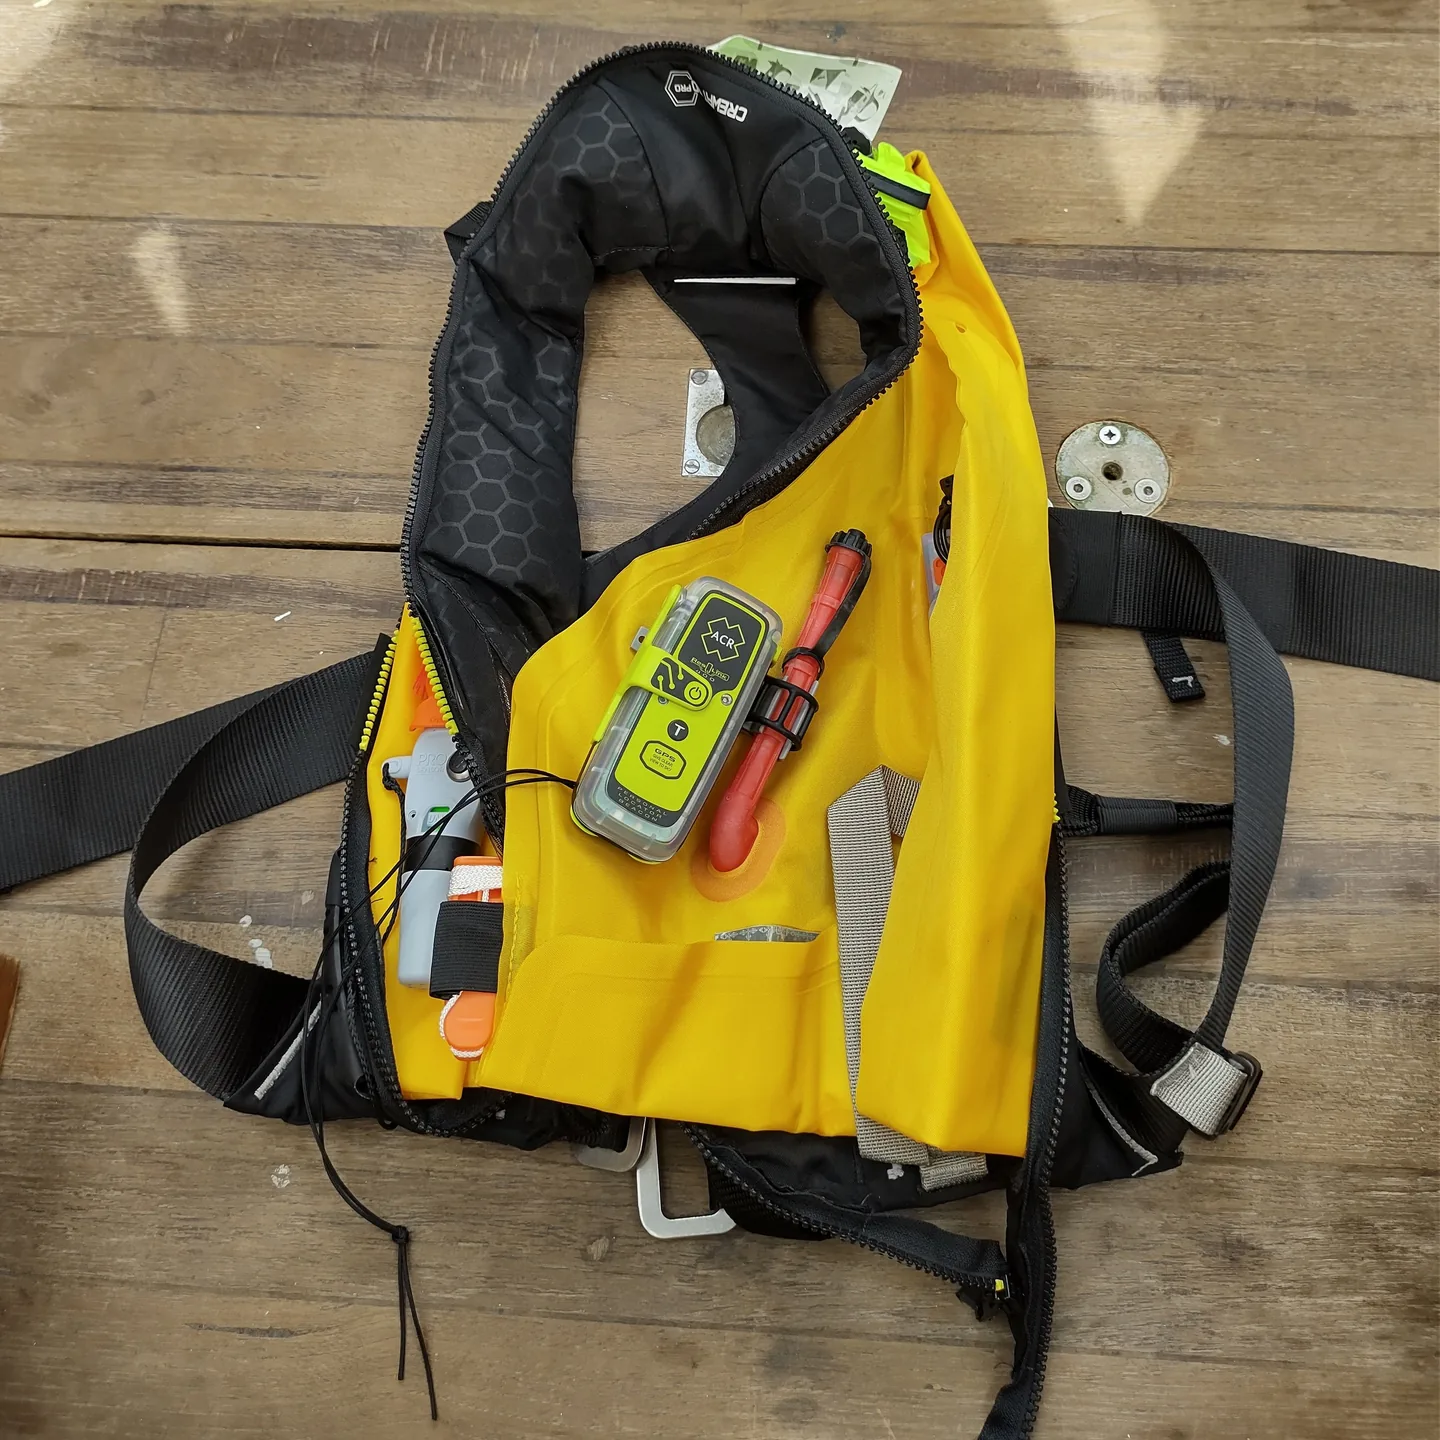
Open the cover only in the way specified by the manufacturer and locate the internal label. Record the maker, exact model, buoyancy level, inflator type and rearming-kit reference. Two jackets with nearly identical covers can use different cylinders or activation components, so visual similarity is not proof of compatibility.
If the manual has disappeared, use the label to obtain the document for that precise version. Transport Canada explicitly directs users to find the model number and manufacturer and request the instructions. Generic videos may explain the principle, but they cannot establish the correct part, indicator logic or folding sequence for every device.
Identify whether the inflator is manual, automatic with a water-sensitive element, or pressure activated. A manual unit requires the wearer to pull its handle; an automatic unit may also provide a manual pull and an oral backup. The wearer should be able to locate those controls without looking, because an emergency is a poor time to discover how the jacket works.
A short check before every outing
Begin with the textile structure. Look for tears, burns, punctures, abrasion, mould, failed stitching or stiffened webbing, then operate the buckles and adjustments. Confirm that the pull handle is visible, unobstructed and reachable when the jacket is worn correctly.
Inspect the status indicator according to the manual. Transport Canada’s general checklist says to confirm that it is green, but the form and meaning of an indicator are system-specific. A green display alone does not prove that the cylinder is full, correctly sized or securely installed.
Check the CO₂ cylinder next. It should match the specified part, sit correctly, show no corrosion and not have been pierced in a previous activation. Screw-in cylinders can loosen; RNLI guidance calls for their tightness to be checked monthly, while still respecting the maker’s installation method rather than applying arbitrary force.
Examine the oral tube, its cap and the adjacent bladder fabric. Roughness or corrosion on a cylinder can abrade material that touches it, so changing the cylinder without inspecting that contact area can miss the consequential damage. Any uncertain component takes the jacket out of service until it is resolved.
Leak-test timing must follow the model manual
Slow leaks are not always visible when the bladder is first inflated. Transport Canada describes a monthly test, and an additional test whenever damage is suspected: orally inflate the bladder until firm, leave it for 16 hours, then check whether it has retained firmness. RNLI guidance specifies a 24-hour period in a dry place.
Those different durations are not a licence to pick whichever is convenient. They demonstrate why the model manual controls the procedure, including duration and inflation level. Batoo’s suggested method is to note the start time, approximate room conditions and result, so a gradual change is assessed consistently instead of from memory.
Keep an automatic inflator dry during the test unless its instructions say otherwise. Transport Canada also describes holding the oral valve under water and checking that bubbles do not escape continuously, while preventing water from reaching the automatic mechanism. A leak, deformation or ambiguous result should be referred to the manufacturer or service representative.
Do not improvise when releasing the test air. RNLI guidance explains that the reversible oral-tube cap is the intended tool on applicable designs; another object may damage the valve. Once deflated, the bladder must be dry and folded exactly as illustrated, leaving the inflator and pull handle free to operate.
Rearming is a complete reset, not a cylinder swap
A jacket inflated from its CO₂ supply is no longer ready merely because the bladder has been emptied. The spent cylinder must be replaced and the inflator reset; an automatic design may also need a new bobbin, capsule or other water-sensitive element. Transport Canada says the rearming kit should be manufactured specifically for the jacket’s make and model.
Begin with the manual and compare the kit reference, cylinder specification and inflator type with the jacket label. Check any replacement date printed on an automatic component. Similar threads or packaging do not establish interchangeability, and a wrong gas charge can leave the system outside its designed configuration.
After a water deployment, rinse and dry the jacket as its instructions require, keeping the firing mechanism dry where specified. Fit the new components in the stated order, confirm the status indication and return the pull handle to its proper position. Only then should the bladder be folded, without twisting it or trapping hardware against its fabric.
Carry a compatible spare kit for every jacket type on board, a point made by both Transport Canada and the RNLI. A spare has value only if it can be matched and fitted correctly. If the crew cannot complete the procedure with confidence, label the jacket unavailable and send it for service instead of returning it quietly to the rack.
Owner checks and professional service do different jobs
Routine checks do not erase the need for the prescribed service. Transport Canada’s annual full inspection includes the leak test, expired components, inflator operation, oral tube, harness, buckles and cover; the RNLI also recommends annual servicing by the manufacturer or a qualified agent. The controlling interval and permitted owner tasks remain those for the exact product and regulatory context.
A compact equipment log turns this into a managed process. For each jacket, Batoo suggests recording an identifier, model, inspection date, leak-test result, replacement-part code and date, next due date and the person doing the work. That is an editorial management recommendation, not a regulation, but it prevents identical jackets and loose spare kits from losing their history.
Familiarisation can include a controlled test in safe shallow water, as Transport Canada suggests, with supervision and the correct rearming kit ready. The exercise can reveal fit, the location of the pull and oral tube, and the inflated jacket’s behaviour. It should never create exposure to hazardous conditions or be treated as professional servicing.
Cleaning, drying and storage preserve readiness
Salt, grit, dirt, moisture and heat can damage fabric or interfere with components. Transport Canada’s boating guide says to dry flotation equipment thoroughly after an outing and store it in a cool, dry place away from direct sunlight. It advises mild soap and running water for cleaning rather than dry cleaning.
Do not sit or kneel on the lifejacket, and never use it as a fender. Stow it where it is accessible and ventilated, not compressed beneath equipment or sealed while damp. Before a long lay-up, complete the required checks, let every part dry and leave a dated reminder for recommissioning.
The final status should be unambiguous: available or out of service. A missing manual, uncertain bladder or unmatched rearming kit cannot be corrected by approximation. Provide another suitable lifejacket and send the questionable unit to an appropriate service provider.
Sources and references
Sources consulted and references retained to verify data and context.
- Inspection and Maintenance of Inflatable Lifejackets and Personal Flotation Devices — SSB No. 12/2019Transport Canada · 2019-10-24
- Lifejackets and buoyancy aids — choose and maintain yoursRoyal National Lifeboat Institution
- Safe Boating Guide 2026Transport Canada
- Lifejacket with PLB fitted inside — photograph and license recordWikimedia Commons · 2022-07-21
Continue reading
406 MHz EPIRB and PLB: choosing, registering and testing
September 27, 2026 · 7 min read
Navigation lights: inspect and test them aboard
September 26, 2026 · 7 min read
Boat reboarding ladders: test them from the water
September 25, 2026 · 7 min read